Building a full stack web application from scratch
Most of the time when dealing with a new library or framework, or new technology in general, an overly tough step is to set up a working environment. Once you have a running example you can really start following tutorials and building something, but until then it's just a frustrating experience.
So, let's build a Multitier application from scratch!
I will only chose freely available software (if possible FOSS), starting with Ubuntu. The goal is to have a running, fully functional application without any mocked data or services. The focus is to get a working example, not to build something complex in the first place.
Stack
We'll build a full stack which looks like this:
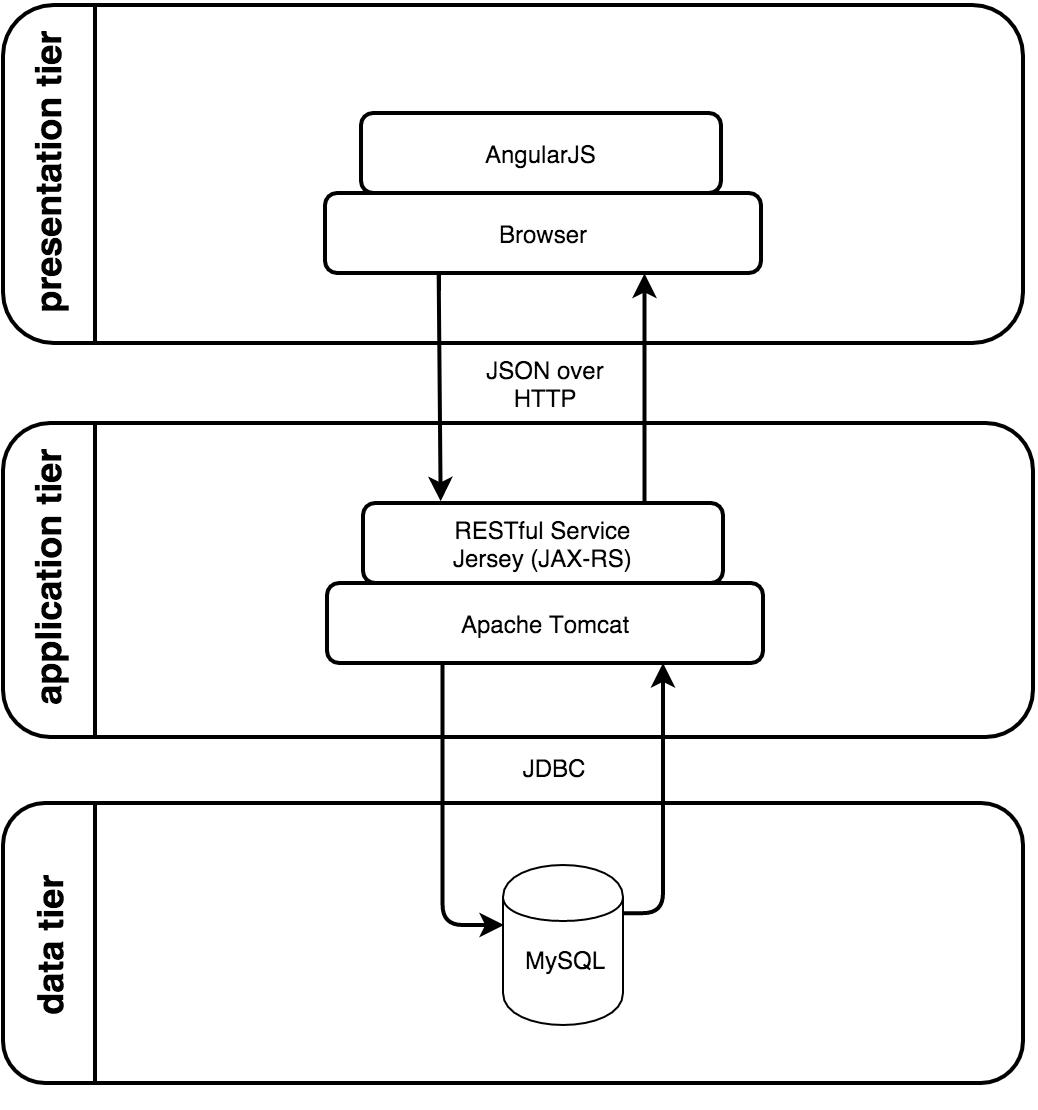
- Presentation tier: HTML webpage with Bootstrap 3.3.6, AngularJS 1.5.0
- Application tier: Apache Tomcat 8, Jervis (JAX-RS), REST-Service
- Data tier: MySQL 5.5.47
The operating system
To really start from scratch, I set up an old laptop with Ubuntu 14.04 LTS. If you're comfortable with the OS you already have you can skip this step, the most complicated step will be configuring eclipse, which is available on Linux, Mac OS X and also Windows.
If you have a spare computer lying around and you also want to install Ubuntu, go to the Ubuntu download section, download and burn a copy of 14.04 and just reboot your computer and follow the installation steps.
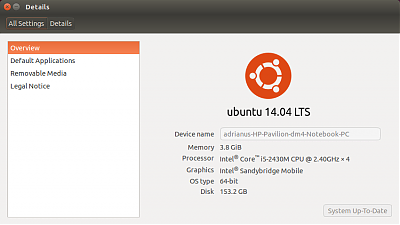
Ubuntu because it's freely available and also the step from Desktop to Server isn't that big.
After installing, we're installing the latest updates by firing up a terminal and running
sudo apt-get update
sudo apt-get upgrade
The database
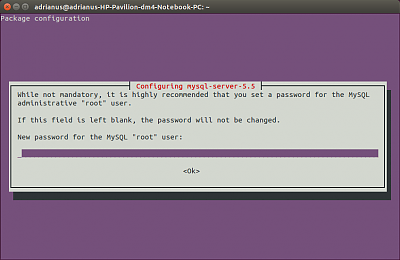
Install MySQL with
sudo apt-get install mysql-serverYou can then set a password
Log in to your new database with
mysql -u root -p and entering the password you specified before. Now we're creating a new database with a user and two tables:
The last line provides the full view on the database as we're going to use it in our application:
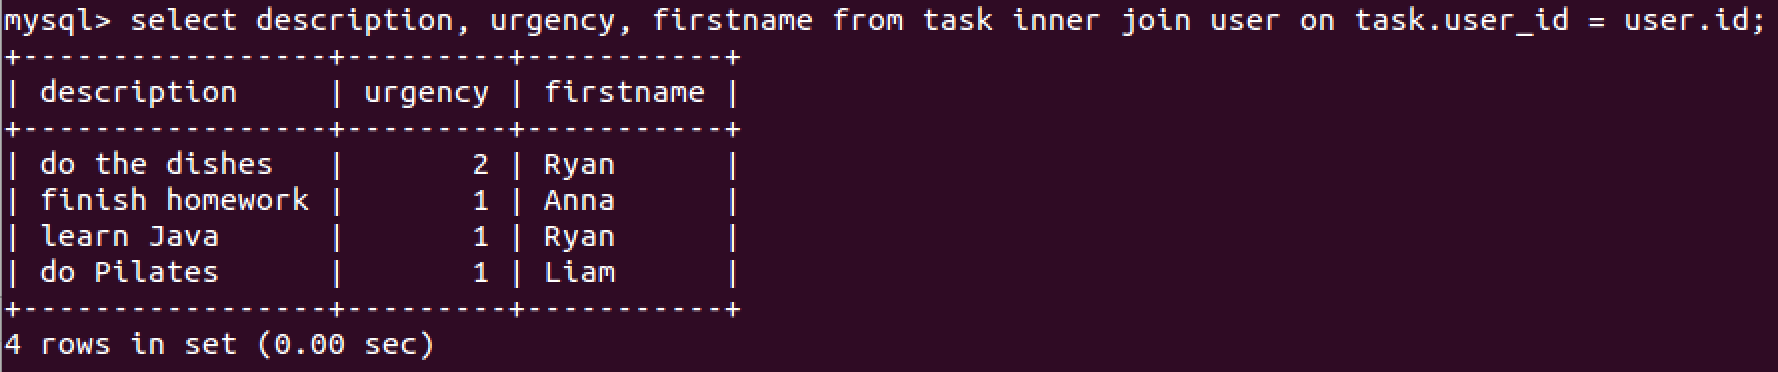
It connects the task with the user table and shows all tasks with an assigned user.
Why using singular nouns for the user and task table? - "A table should be named after the entity it represents", see this SO post..
Until now we've been working as DBA (database administrator). The last step is to create a read-write user for the application, so the application server can access the data:
GRANT ALL PRIVILEGES ON todolist.* TO todolist_user@localhost
IDENTIFIED BY 'J4k-pa3$?%-u';
The database is now ready. If you want to stop the MySQL services or get them running after a restart you can use the following commands:
service mysql start
service mysql stop
Eclipse
As a next step, we need a IDE to build the application layer. The Java code will be run by Tomcat and act as a "servlet" (code that's executed this way).
You can download eclipse with
sudo apt-get install eclipse-packageor also at the Eclipse download page, either chose "Eclipse IDE for Java EE Developers" directly and unzip it at a location of your choice, for example ~/eclipse, or as an alternative, use the eclipse installer.
You can then start it from the Terminal with the command eclipse. Just set the standard workspace ~/workspace when starting it the first time and you should have a fresh eclipse installation.
Integrating Tomcat
Java should be installed by default on a new Ubuntu system, but you can make sure it is by running
sudo apt-get install default-jdkAfter that, we'll need to download Apache Tomcat, I will be using Tomcat 8 here. Go to Binary Distributions > Core > zip, download and unzip it, for simplicity I'll just put it at ~/apache-tomcat.
After downloading and unzipping, we now need to make it executable:
chmod 755 ~/apache-tomcat/bin/*.shNext, we need to let eclipse know where it can find our Tomcat server. Go to Window > Preferences > Server > Runtime Environments > Add... and add a new Tomcat 8 Server, and you can choose which version you want. We'll take Tomcat 8:
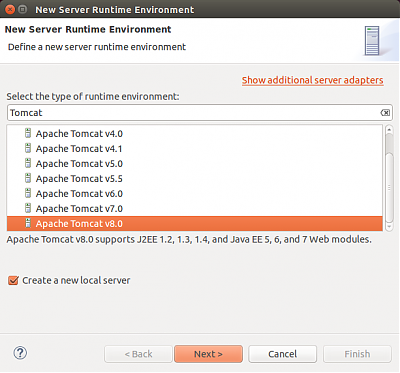
Also, check the option "Create a new local server" and choose Tomcat installation directory: ~/apache-tomcat, so we'll have a project in eclipse with an instance of our webserver.
Building a RESTful service
Next, we'll have to create RESTful service with some resource identifiers (URIs) which make sense, so our client can call those to get or also modify data. An excellent overview how to use which HTTP method ("verb") is shown in the REST API Tutorial.
We define some endpoints:
- GET /tasks - get all tasks
- POST /tasks - post a new task
- DELETE /tasks/{id} - delete task with id
Now that we defined what our service should provide, we can build it.
Step 1 - create a new project Make a new project, a "Dynamic Web Project", and name it "Todolist". Important: In the step below, change the Configuration > Modify check the items Java, Dynamic Web module and also JAX-RS:
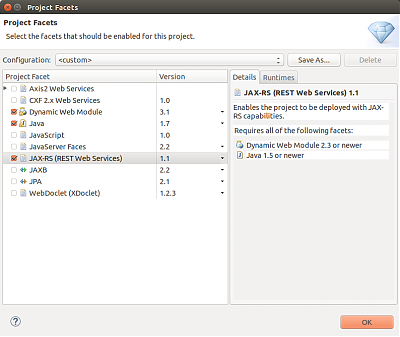
In the last step, also check "Generate web.xml deployment descriptor".
Step 2 - adding Maven When you're finished, right click on project > Configure > Convert to Maven project. Then, add the following dependencies to your pom.xml, so that it looks like this:
This will not only add the jersey dependencies, but also Jackson or Genson, some libraries that the serialization from a Java Object to a JSON-String will work smoothly :-)
Step 3 - configuring the web server Now we need to tell the web server what to do when called and how to react if a GET/POST/etc.-request is coming in. Add the servlet and the filter part to your generated web.xml:
The filter will also handle requests from another domain, which you'll need when testing locally. When using in production you should change this part or at least configure the exact domains that are allowed. If you like, learn more about CORS.
Step 4 - add some code
Now that our server is configured, we need to add some actual code so that it's even useful for something. We'll have a Task as Model and a TaskService which handles the incoming requests and what will be returned.
In the folder Java Resources > src folder, add a package tasks and add the following two files:
Task.java
TaskService.java
As said, Task.java represents our Model class of a task, and with @XmlRootElement, we're making it serializable.
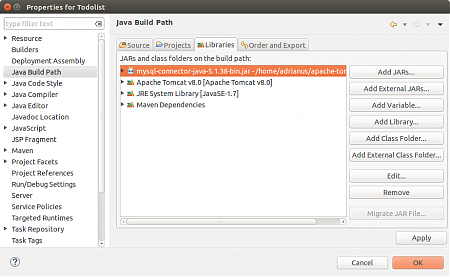
Step 5 - connecting to the database Now we need to tell our server how to interact with the database. For this we'll use JDBC, which can be a connector to pretty much any database. Download JDBC-driver here and add it to Eclipse: Right-click on Project > Java Build Path > Libraries > Add MySQL library.
You'll also have to add the database connection as a resource and specify some parameters like our user we created, or where the server can find the database. For this, create a new file context.xml in the folder META-INF:
Testing You're now ready to test your web server. Run server, go to http://localhost:8080/Todolist/hello and you should see "Hello Webservice!"
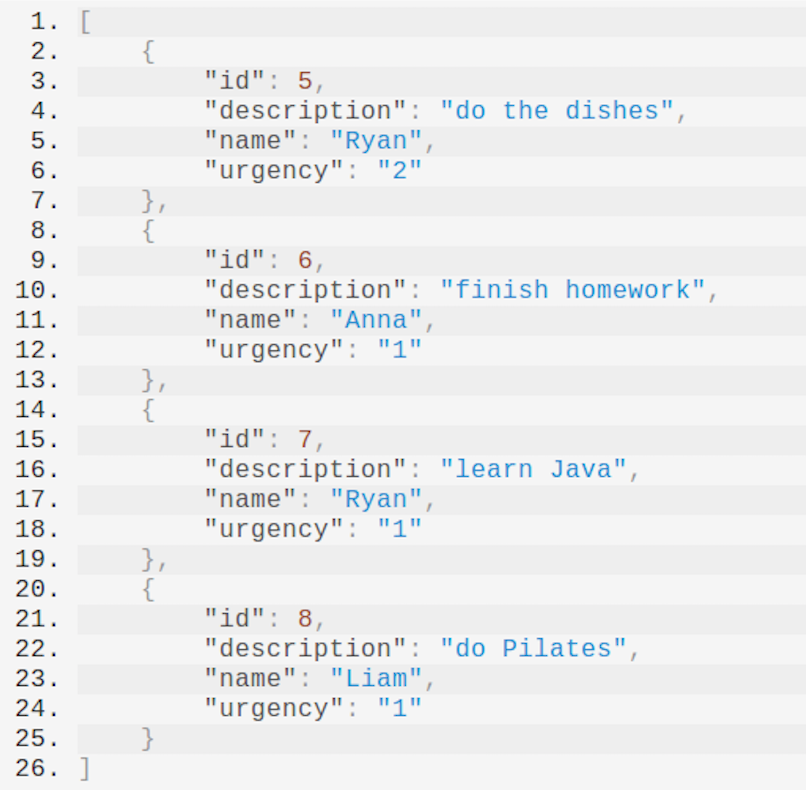
For testing if the connection to the database works, try getting the tasks at http://localhost:8080/Todolist/tasks. This should return a list with all tasks as valid JSON, for example with Postman or any REST analyzing plugin for Chrome or Firefox.
AngularJS & Bootstrap
Next, we will set up a simple front end in AngularJS which will call the REST service to get and manipulate the data. I just set up a very simple page index.html with Javascript and everything included, using Bootstrap. Have a look at the Bootstrap components.
In our Angular script, we basically have a task list which we manipulate if the user loads the page or clicks the "add" button. So the important parts are the following:
// prepare an empty task list
$scope.tasks = [];

// called when page is loaded
$scope.getTasks = function() { ... };

// add new task when button is clicked
$scope.addTask = function(task) { ... };

// delete a task when "check"-icon at task is clicked
$scope.deleteTask = function(task) { ... };
The cool thing about Angular is that with a single line of code (using $http), you can ask a REST service for data and save that data into, for example, a task list, which will be updated in the HTML.
Full index.html:
You can always have a look at the console and also the requests the browser fires in the Chrome debugger console, ctrl + shift + i (Mac: cmd + alt + i). For example, if the server is not running, Angular will not be able to fetch tasks:

It should look like this:
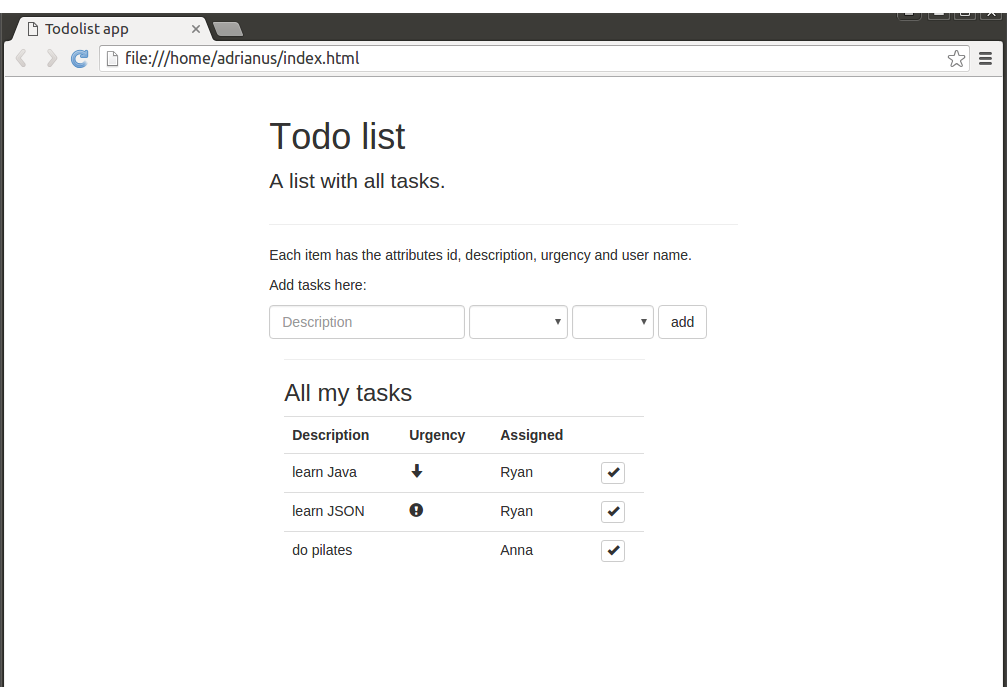
So we set up a full running example, from database, REST-service up to the frontend! :-)
Next steps
There are plenty of things to add or improve, such as:
- Add a PUT method to the service, allowing to alternate a task
- Make a user administration page to add or modify users, with the according REST URIs.
- Using JPA, the Java Persistence API, try to connect your data model directly to the DB, so you don't have to write queries by yourself.
- Add dates to the tasks, and make them sortable by date!
- Have a look at Spring, an alternative to Jersey, to build your REST service
- build a login so that other users could manage their own tasks
- Consider switching from MySQL to MariaDB, see this article
Thanks for reading and good luck!
